Showing posts with label Revlon Photoready. Show all posts

Tuesday, April 3, 2012

FOTD

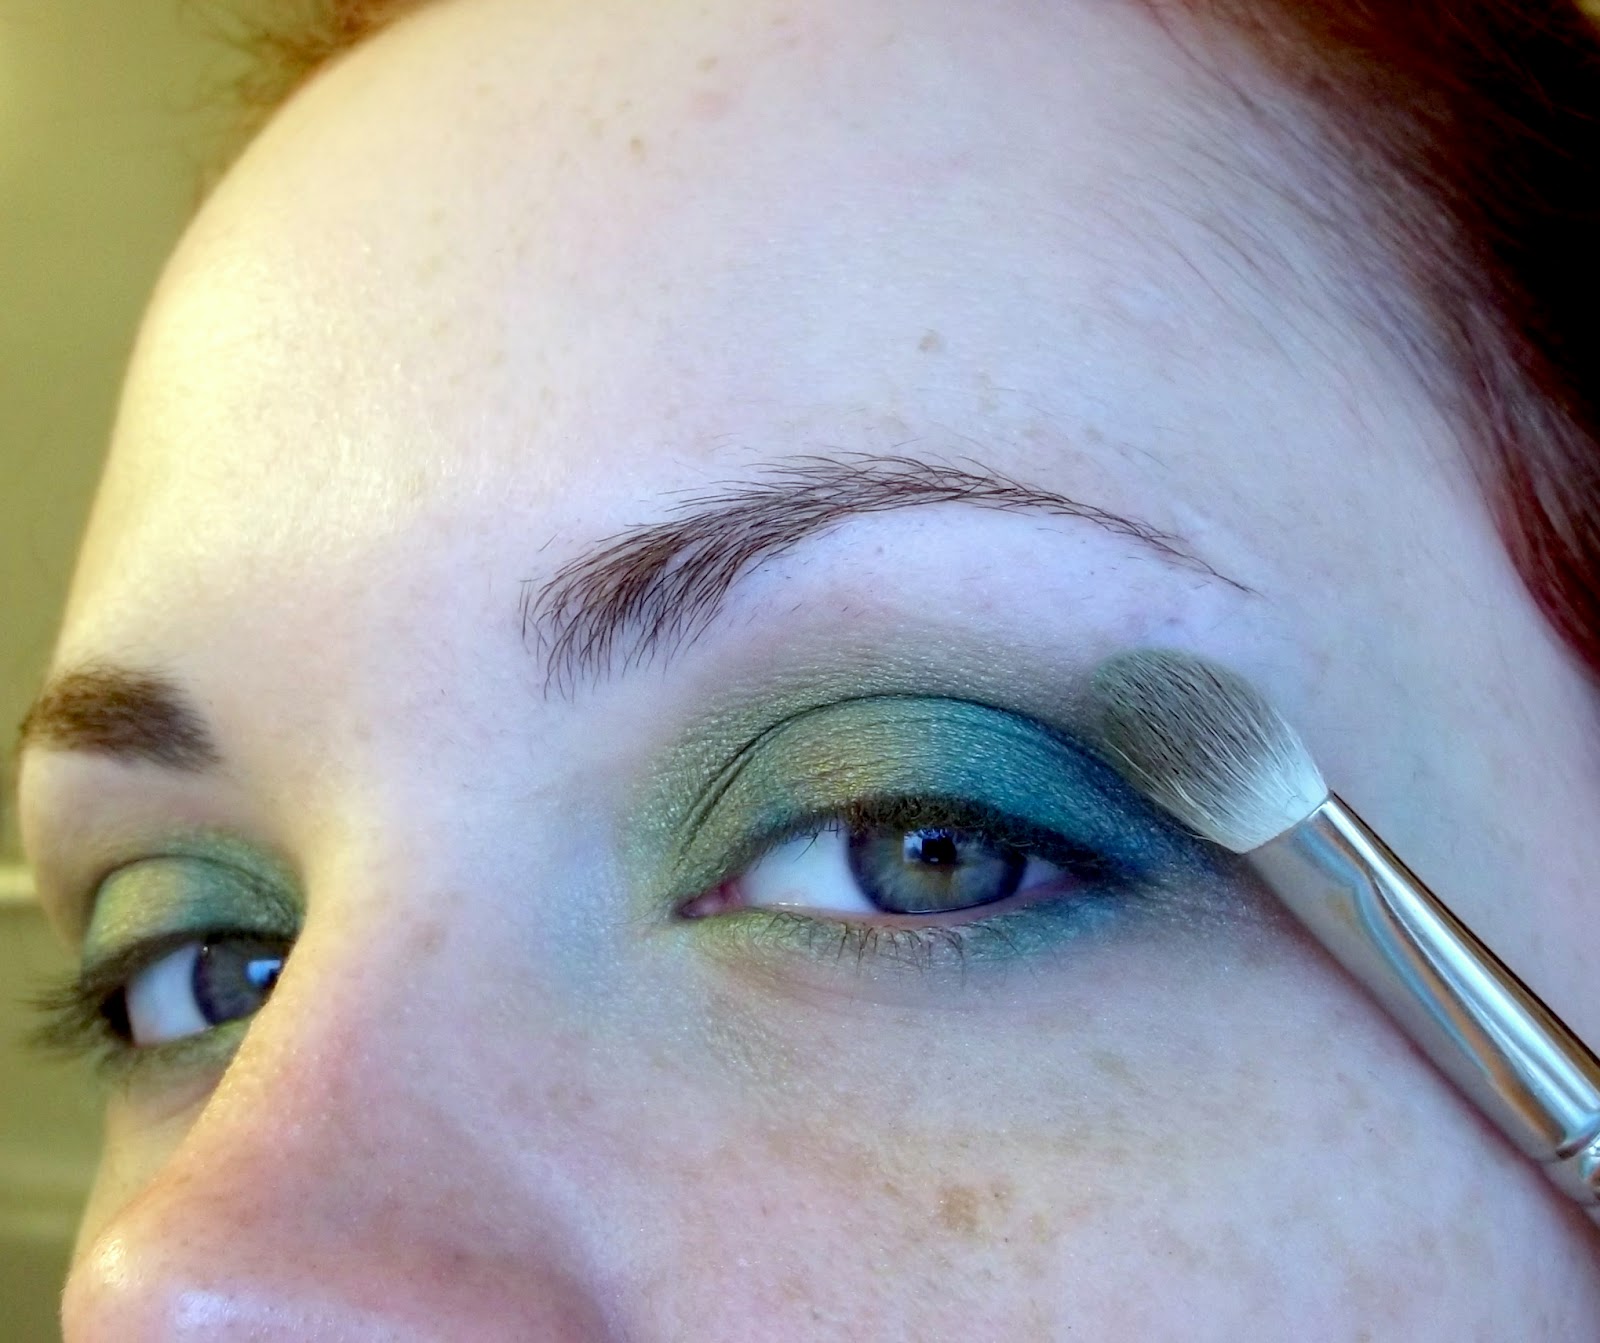
This was my Face of the Day. It's more of an Eye of the Day. The colours, particularly the green, absolutely refused to photograph properly! It was MAC's Bitter, so a really intense bright limey almost yellow green. I have every intention of editing this later, as it's rushed and poorly written.
I used:
  • Tarte ReCreate primer
  • Benefit Lemon Aid
  • Urban Decay Primer Potion
  • MAC Blanc Type
  • MAC Too Dolly (LE) (*or MAC Aquadisiac)
  • MAC Bitter
  • MAC Deep Truth
  • Urban Decay Dashiki (*MAC Freshwater works well, too)
  • MAC Nylon
  • Gosh eyeliner
  • Urban Decay 24/7 pencil in Electric
  • MAC Feline eyeliner
  • Stila Stay All Day Waterproof Liquid Liner
  • MAC False Lashes Extreme Black
  • MAC Embark
  • Revlon PhotoReady Airbrush in "Vanilla"
  •  Physician's Formula Peach-to-Glow
  • L'Oreal HIP gloss in "480 - Snazzy"
  • Tarte Smooth Operator powder
Annnd this is how you can create it for yourself. You can use dupes of any of these products. For simplicity's sake, I'll just state what I used:
  • After moisturizing, apply Tarte ReCreate primer to your face
  • Apply UDPP to your eyelids and lower lash line
  • Apply concealer if needed (I applied Benefits Lemon Aid to my under eye, and red areas)
  • Use a big fluffy brush to apply MAC Blanc Type from your lash line up to your brows
  • With a short, stiff shading brush pack on MAC Too Dolly (L.E. from the Hello Kitty, Winter '08/'09, Too Dolly quad) onto your eyelids. You could use MAC Aquadisiac (teal blue)- I don't have it but I would have preferred it for this look.
  • Load Bitter (a super bright snotty green) onto your pencil brush (MAC 219) and tap off the excess. Apply this to your crease. First with a stippling motion, then work in with a windshield wiper motion. You want this to peak just above the crease. 
  • Next, you'll apply Nylon (a frosted pale gold) to the brow bone area with a big fluffy brush, using it to blend the Bitter up, and blend the edges away. You won't so much be blending the Too Dolly and Bitter together. You want those colours to be defined. 
  • Use an angle brush (my MAC 266) or an eyeliner brush to apply Dashiki (a medium sky blue with a hint of teal) from the inside corner of the upper lashline out. You want to keep this close to the lashes, but not so tight that the black liner will cover it
  • Then you'll pick up Deep Truth with the same brush and apply it from the outer corner of the upper lash line, about half way in, blending it into Dashiki in the middle
  • Tightline with your liquid liner (I used Stila Stay All Day)
  • Take Gosh Let's Twist eyeliner (a bright snotty green, equivalent to Bitter) and apply it it generously (so that when you apply your black it will peek through,) from the inside corner of your waterline, half way across
  • and Urban Decay in Electric on the outside, slightly blending them in the middle with an angle or liner brush, exactly as we did with Dashiki and Deep Truth 
  • Apply MAC Feline (a creamy super black eyeliner) working from the outer corner, tapering half way in
  • Slick on a coat or two of  mascara (MAC False Lashes Extreme Black)
  • Using a big fluffy brush (MAC 187), apply Peach-to-Glow to the apples of your cheeks
  • I swept on some L'Oreal HIP in "Snazzy", using the peach side(it's a duo, and they're really pigmented and have a great sheen. These are actually really good!)
  • Set it with powder and a powder brush (I used Tarte Smooth Operator and MAC 187)
  • Fill in brows with an angle brush and MAC Embark, or whatever colour suits your brows (which I did way earlier and forgot to mention. I do brows first. It makes an excellent frame for the rest of your makeup) 


Andddd this link is to the portrait photography page of an amazing local photographer, Dana Brushette. Click "like" on her page to keep up to date on what she's up to. She's always doing cool contests. I entered my son Cailum in her Children's Contest (the Untitled Album) and voting is open until April 21st. We'd love if you would shoot him a vote and help him place somewhere. Dana actually does a lot of cool pinup work that I think you, dear readers, would appreciate. So check it out! Thanks! <3

-H. Cat

Monday, April 2, 2012

Review: Revlon Photoready Airbrush Mousse Makeup


Updated With New Photos!

That's a mouthful! And surely it must be because this stuff made my jaw drop. My local Zellers is turning into Target and they have everything on liquidation. I picked this up. I applied it half heartedly, after reading slam reviews. I looked in the mirror and it seemed fine. It smells horrible, by the way.

It was not until I applied some just to mask some tired looking skin when I needed to photograph my peacock inspired eye tutorial that I was amazed. I was reviewing which pictures to include in the tutorial and my skin looked flawless and glowing. I was so confused as to the secret of this magic mousse.

I tried to research this for you, dear readers. The most in depth explanations include something about little micro light reflectors and formulas that are especially resistant to streaking and patching. Typically there would be no sunscreen, because SPF can make your face glow white in photographs. Just the sort of thing you’d figure. Nothing special. Generally a sheer to medium coverage that will blend into the skin extremely well, rather than sitting on top of it. If you’re looking for heavier coverage you’ll probably need a concealer.

Basically it’s all smoke and mirrors, which explains why it was just a drugstore foundation to my naked eye, but in pictures it amazed me. Absolutely amazed!

Pigmentation & Coverage: I bought this in shade 010 Vanilla. I think it was the lightest warm shade. It is a good match for my skin. It’s a light to medium coverage, which works for me because I don’t have a lot of imperfections (if you don’t count my freckles) and I prefer a natural and dewy finish- which this has. Some people have complained that there are sparkles in it, but I didn’t really notice.

Formula & Finish: The formula is a smooth, wet, lightweight mousse. It still foams when applied to your face, which tickles and feels strange. The finish is youthful and dewy, as I’d mentioned.

Longevity: I applied this 11 hours ago. It’s still working for me, but it’s faded a bit. Mind you I stayed in the house most of the day and didn’t give it much of a challenge.

Ease of Application: I’ve applied this using a cosmetic sponge, buffed it in with my MAC 187 duo fiber (skunk brush), and applied it with my fingers. It looked flawless and did have an airbrush finish when buffed in with the brush. The sponge was the second best choice, but fell far from the brush. Finger application was poor.

Packaging: Aerosol can with a top that you press down to release the mousse. I was expecting it to be a spray, but that's my own stupidity because it says mousse right on the can. You have to be careful not to get too much, which is easy to do. This means there’s potential to waste a lot of product. Even when I tested it in the store I pumped waaay too much and had to take out a baby wipe because I had more than I could have ever blended into my hand.

Oxidization/Transfer: Some people have claimed that this oxidizes, though I haven’t seen this yet. As for transfer, I’ll have to get back to you on that. I haven’t noticed anything, but I also buffed it into my skin with a brush and then dabbed my face with a cosmetic sponge. I can see that it may transfer, because my face was still left damp after buffing… hence the blotting with a sponge.

Breakouts/Clogs: No immediate irritation. I might update this in a week or so.

Shade Range: Shade range was pretty limited. I would like to see a lot more colour choice. I find that Revlon doesn’t offer a good variety of shades. When I used ColorStay I bought two and combined them to make my own colour.

Smell: This smells absolutely horrible. I am considering purchasing more MAC Fix+ to spray on my face after application in hopes that it will mask some of the stink. It smells kind of like… paint, chemicals, and olives.

Price: I’m not sure what the regular price is, but I got this on liquidation for about $10.

Repurchase: I will probably try something else after, but I would definitely consider repurchasing this, especially with photos in mind. It’s an average drugstore quality foundation for every day life. It’s in pictures that this stuff really shines. It’s called Photoready and it is absolutely that!

To sum it up, I will use this foundation when I’m expecting to have pictures taken. I will even overlook the horrible smell. I am still in shock at how flawless my skin looked in these pictures!

Here's what I'm talking about. The first picture is without foundation. The 2nd and 3rd are with the foundation, with and without flash.  And I must warn you, these pictures are dangerously detailed in full size. You're going to see my mustache in all it's glory! Some unibrow... some snot. I bare it all for you, dear readers.  

(Mustache, unibrow, lunch lost... Haha)


See that!? I'm in awe. Freckled tired mess, to dewy fresh flesh!
-H. Cat


And the Update...

I had limited time this morning. Bus to catch, errands to run, but I managed to throw on some makeup and snap these for the blog. Tomorrow I will try to remember to snap a picture of how it is holding up after 6 hours, 8 hours, 10 hours. 

Freshly washed & prepped face. I used Cetaphil moisturizer and primed with Tarte ReCreate

I applied Benefit's Lemon Aid to my under eye area and the redness around my mouth

This is the PhotoReady Mousse. It tingles!

Here I am buffing the mousse into my skin with my MAC 187

And then I took some after shots...

Tried to make sure I got some varieties of lighting...

And then I applied some gloss, eyeliner, mascara, and set it with Tarte Smooth Operator powder

And no- I did not brush my hair. I rarely do these days :D
-H.Cat


Sunday, April 1, 2012

Eye: Peacock

I thought I would do a peacock inspired eye to go with my recent Peacock Nail Tutorial. I haven't done a peacock eye since MAC came out with Peacocky in Winter 2010. The one I did back then was a green and purple, so I thought I'd change it up. This look was a half success. The problem was a combination of things. That I'm feeling lazy, that my brushes were dirty so I couldn't get good colour definition, that I started without a clear idea of what I wanted to do (and overworked my poor sore eye), and also that there were waaay too many colours I wanted to cram in here. I have so many perfect colours!
Anyway, enough buildup! The bottom line is that this is what I did, the colours and brushes I used, and hopefully I inspire someone to try their own.
(Also note my skin in these pictures, in the finished shots. This is the Revlon Photoready Airbrush stuff... Wow! I will review this soon. And finally, excuse my budding unibrow :D)

What I used:

Note that the number has nothing to do with application order... or anything other than to indicate which colour I used)
These are all MAC shadows.
1. Amber Lights
2. Humid
3. Blue Candy (LE)
4. Juxt
5. Freshwater
6. Deep Truth

I have a Lise Watier glitter in the photo that I did not end up using. There is my HG Urban Decay Primer Potion up in the right corner, and from left to right we have MAC False Lashes Extreme Black, Urban Decay 24/7 Pencils in Electric & Baked, MAC pencil in Undercurrent, and Stila Stay All Day Waterproof Liquid Liner.
The 219 that is hiding is a pencil brush. From top to bottom, you'll see me refer to these as  my flat brush, shading brush, blending brush, angled brush, pencil brush, and fluffy brush. 


 I applied Juxt lightly all over my eyelid up to my brow with my big fluffy brush, then I patted it on my lid with my shading brush.


I always wiped my brushes after switching colours, but you should probably use different brushes if possible. I was just being lazy. Here I'm applying Amber Lights to the center of my eyelid in a patting motion using my shading brush.


I used my shading brush and Blue Candy (LE) to apply slightly rounded line of colour. You want this colour to "hug" your eyeball. (sounds gross, right?) 


Then you're going to do the same to the other side of your eyeball, curving outward. Like so... 
After that, you'll be building your colour towards the outer corner of your eye. I applied some Lucky green right beside the Blue Candy, and then some Freshwater. It started to look a bit muddy... too many colours on one dirty brush, but I go back in to define the colours in a minute.

I dipped my pencil brush into Amber Lights and patted over the original section. Then I did the same with Lucky Green, Blue Candy, Freshwater... I went from lightest to darkest just so I wasn't buggering up the brush. I could have avoided this all with better planning, but this is how it all went down! Haha. 


I grabbed my blending brush and very lightly worked from the inside corner to the outside with little outward sweeps. You want to blend it, but not too much. The colour individual should definitely stand out. 

From here I cleaned up the fallout with a Q-Tip and some moisturizer. I took my pencil Brush and applied Deep Truth to the outer 1/3rd of my crease and blended it in a windshield wiper motion with my blending brush, then took my fluffy brush and lightly swept some Juxt overlapping my crease colour and a bit up towards the brow. I blended that very well with little circular motions. I applied my eyeliner, and I used Humid to blend outer corners of my eyeliner up into the Deep Truth applied to my crease. 

A few of my pictures didn't turn out, which is why I don't have pictures of the final few steps, but I used the 3 liners along my lower lash line, just slightly below the waterline (that way when I applied my black liner it wouldn't completely cover them.) I used Baked (the golden colour) in the inner corner, Electric (the bright blue) in the middle, and Undercurrent in the outer corner.I used an angled brush blend the end of one into the start of the next, and flicked the end of Undercurrent up into the winged eyeliner. By now my eyes were so sore from being overworked (it was a trial and error thing) that my eyeliner did not want to stay in place. 

I applied Feline to my waterline, which is a dark black MAC liner. I set it with a fluffy duo fiber brush (MAC 187) and Tarte setting powder. I applied one coat of MAC False Lashes Extreme Black mascara. Somewhere in between I penciled on my brows and applied Revlon Photoready Airbrush makeup with a 187 and a cosmetic sponge. Here is the finished product:


 It's kind of a mess of a tutorial, but it's been a mess of a process! <3
-H. Cat