Showing posts with label Tutorial. Show all posts

Monday, August 6, 2012

Bow Hair Tutorial, Sort Of.

I have a minor obsession with bows and most things cute and feminine. If you can twist it into something darker, even better. So of course I liked Lady Gaga's bow hair and all the variations circulating the internet after.

This works best with at least shoulder length hair, I'd assume. If your hair is super long you may have more work to do in hiding/tucking your ends in. I used unwashed hair, because believe it or not- that nappy brillo-esque hair I have is too silky to style after washing and ironing.

Of the 3 times I have attempted this, the 2nd time was my favorite. This is a picture of that attempt. 

I don't have a webcam and it's kind of dodgy trying to take pictures while styling your hair. I also wrote this with the assumption that everyone knows how to properly use bobbypins and backcomb, so if you don't- I'm sorry!

The first thing I did is not mandatory, but if you want to pop up the front of your hair like I did, it may make it easier.

My bangs had a weird kink in them because I had a stiff hairband in to keep my hair out of the way while I showered, etc. I sectioned off the front of my hair and put it into a ponytail, but farther down the hair. Basically you'll hold the hair tight and try to pop up the front to suit your taste and figure out how far down to place the elastic. 


Grab all of your hair and gather it into a ponytail. It should be placed really high at the top of your head... You could attempt a bow at the back of your head but you'd need some awesome mirror to mirror navigation skills. I'm too impatient for perfection, as you'll see. 


So this is the ponytail I ended up with. It also doubles as my imitation of a shrunken head. 


Next you'll need to pull a section from the very front of the ponytail. Nothing too small or too big. This will be the "knot" of your bow. Don't worry. You don't really have to tie your hair. 


Clip that section from the front of the ponytail aside. 


Divide the remaining ponytail into two sections. You'll only be working with one at a time, so pin the other aside for now. 


Using a brush for teasing or a comb, take the unpinned section and tease it from the base down. You want a lot of volume. 


It'll look all messy and crazy like this. But then you'll brush over it very lightly, smoothing it out, but not overworking it, as to ruin the volume. After, it should resemble the picture below. 


You'll fluff that part up and tuck the end under and hide it with a bobby pin. 


That's what it'll look like pinned in place. I didn't get a really clear shot, but here's another, this one from the back:


In this picture I've already repeated the steps with the second section. You have probably figured out that it's exactly the same for both sides. 


Now take the smaller section that you would have separated and clipped aside first

Wrap it around each end of the bow and across the middle if you can. You can experiment a bit with how you wrap it to make it look better. This is my 3rd attempt, and I much prefer the way I wrapped the center in my second attempt, which was the very first picture 


When you've got it all wrapped it, hide the ends and pin it securely. 

All done! 

Just a wee bit messy!


Whatevs!
-H.Cat<3>

Sunday, April 1, 2012

Eye: Peacock

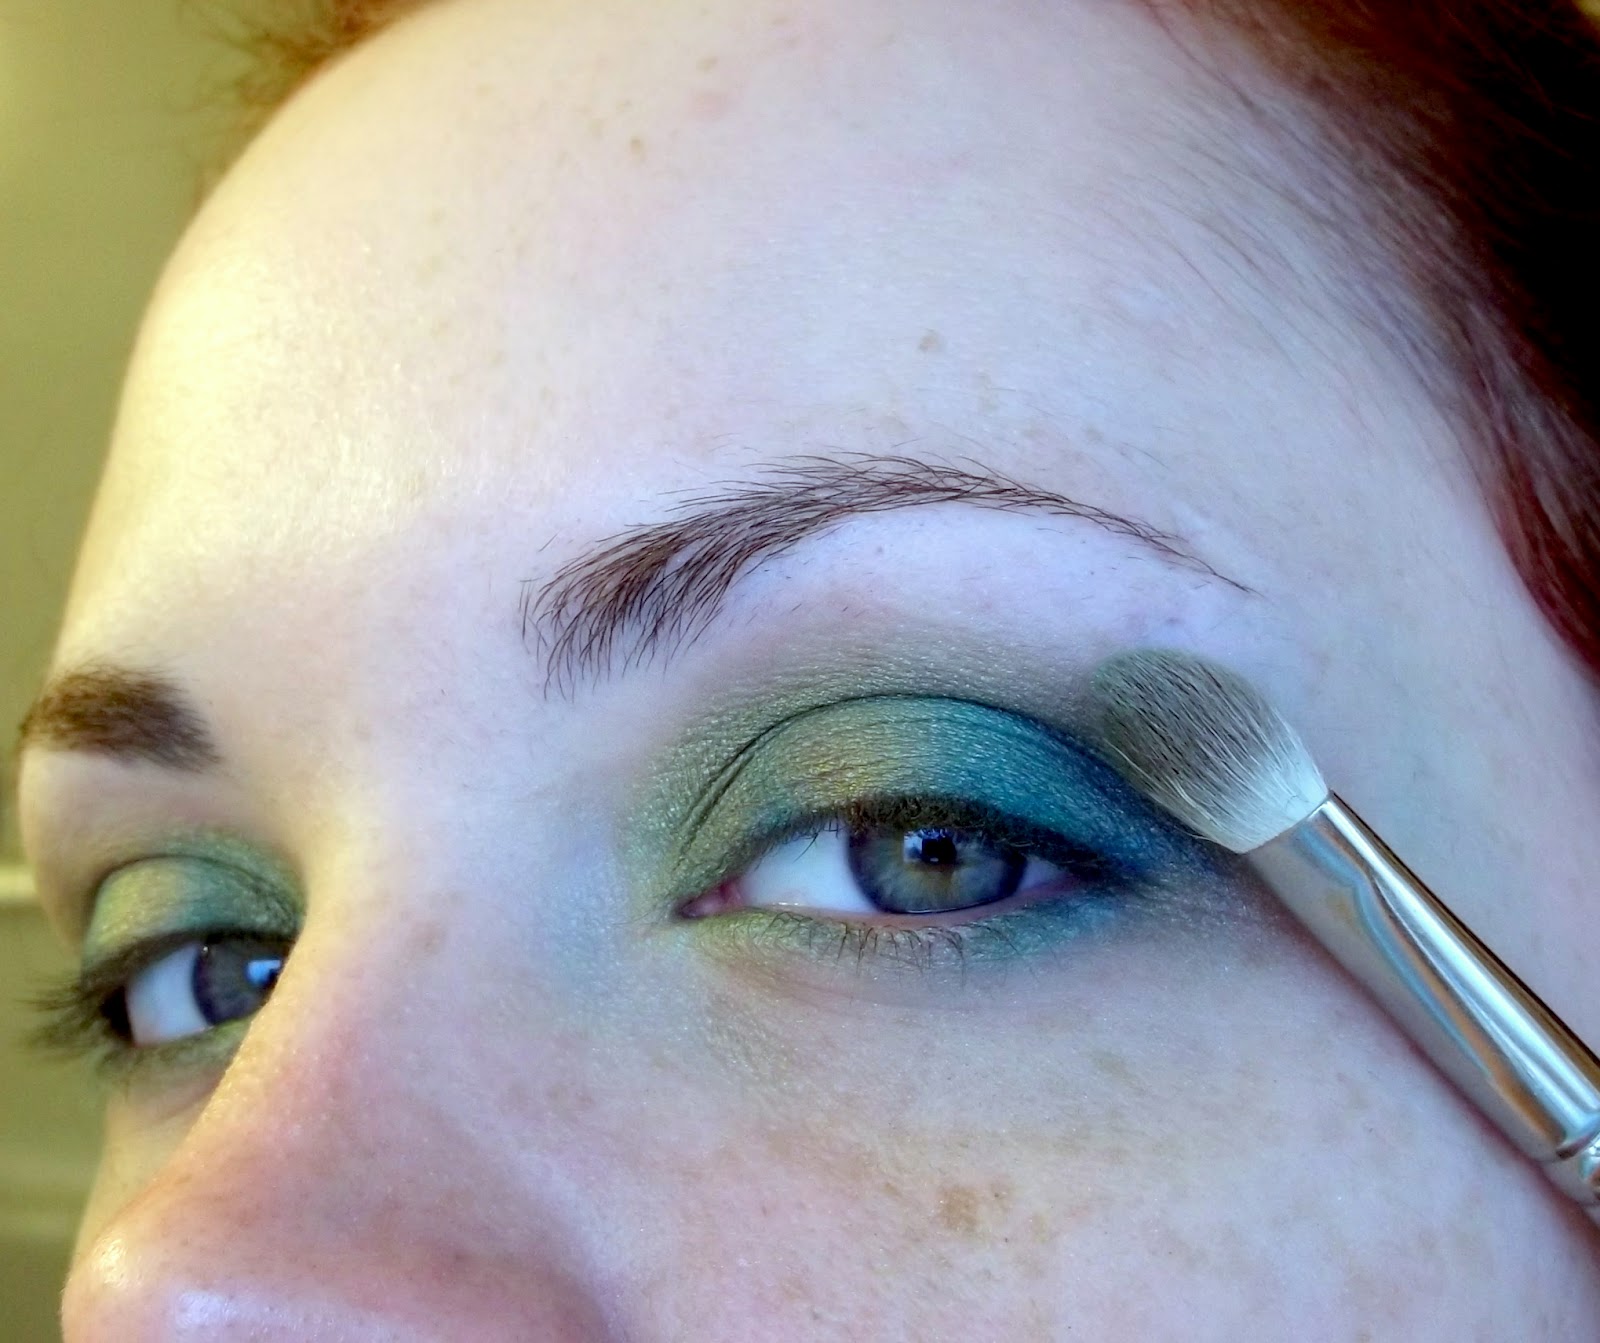
I thought I would do a peacock inspired eye to go with my recent Peacock Nail Tutorial. I haven't done a peacock eye since MAC came out with Peacocky in Winter 2010. The one I did back then was a green and purple, so I thought I'd change it up. This look was a half success. The problem was a combination of things. That I'm feeling lazy, that my brushes were dirty so I couldn't get good colour definition, that I started without a clear idea of what I wanted to do (and overworked my poor sore eye), and also that there were waaay too many colours I wanted to cram in here. I have so many perfect colours!
Anyway, enough buildup! The bottom line is that this is what I did, the colours and brushes I used, and hopefully I inspire someone to try their own.
(Also note my skin in these pictures, in the finished shots. This is the Revlon Photoready Airbrush stuff... Wow! I will review this soon. And finally, excuse my budding unibrow :D)

What I used:

Note that the number has nothing to do with application order... or anything other than to indicate which colour I used)
These are all MAC shadows.
1. Amber Lights
2. Humid
3. Blue Candy (LE)
4. Juxt
5. Freshwater
6. Deep Truth

I have a Lise Watier glitter in the photo that I did not end up using. There is my HG Urban Decay Primer Potion up in the right corner, and from left to right we have MAC False Lashes Extreme Black, Urban Decay 24/7 Pencils in Electric & Baked, MAC pencil in Undercurrent, and Stila Stay All Day Waterproof Liquid Liner.
The 219 that is hiding is a pencil brush. From top to bottom, you'll see me refer to these as  my flat brush, shading brush, blending brush, angled brush, pencil brush, and fluffy brush. 


 I applied Juxt lightly all over my eyelid up to my brow with my big fluffy brush, then I patted it on my lid with my shading brush.


I always wiped my brushes after switching colours, but you should probably use different brushes if possible. I was just being lazy. Here I'm applying Amber Lights to the center of my eyelid in a patting motion using my shading brush.


I used my shading brush and Blue Candy (LE) to apply slightly rounded line of colour. You want this colour to "hug" your eyeball. (sounds gross, right?) 


Then you're going to do the same to the other side of your eyeball, curving outward. Like so... 
After that, you'll be building your colour towards the outer corner of your eye. I applied some Lucky green right beside the Blue Candy, and then some Freshwater. It started to look a bit muddy... too many colours on one dirty brush, but I go back in to define the colours in a minute.

I dipped my pencil brush into Amber Lights and patted over the original section. Then I did the same with Lucky Green, Blue Candy, Freshwater... I went from lightest to darkest just so I wasn't buggering up the brush. I could have avoided this all with better planning, but this is how it all went down! Haha. 


I grabbed my blending brush and very lightly worked from the inside corner to the outside with little outward sweeps. You want to blend it, but not too much. The colour individual should definitely stand out. 

From here I cleaned up the fallout with a Q-Tip and some moisturizer. I took my pencil Brush and applied Deep Truth to the outer 1/3rd of my crease and blended it in a windshield wiper motion with my blending brush, then took my fluffy brush and lightly swept some Juxt overlapping my crease colour and a bit up towards the brow. I blended that very well with little circular motions. I applied my eyeliner, and I used Humid to blend outer corners of my eyeliner up into the Deep Truth applied to my crease. 

A few of my pictures didn't turn out, which is why I don't have pictures of the final few steps, but I used the 3 liners along my lower lash line, just slightly below the waterline (that way when I applied my black liner it wouldn't completely cover them.) I used Baked (the golden colour) in the inner corner, Electric (the bright blue) in the middle, and Undercurrent in the outer corner.I used an angled brush blend the end of one into the start of the next, and flicked the end of Undercurrent up into the winged eyeliner. By now my eyes were so sore from being overworked (it was a trial and error thing) that my eyeliner did not want to stay in place. 

I applied Feline to my waterline, which is a dark black MAC liner. I set it with a fluffy duo fiber brush (MAC 187) and Tarte setting powder. I applied one coat of MAC False Lashes Extreme Black mascara. Somewhere in between I penciled on my brows and applied Revlon Photoready Airbrush makeup with a 187 and a cosmetic sponge. Here is the finished product:


 It's kind of a mess of a tutorial, but it's been a mess of a process! <3
-H. Cat

Monday, June 14, 2010

Tutorial: Brush Cleaning; the Thrifty Way

Brush cleaning is necessary to remove the oil and bacteria from your brushes. This is important because the brushes won't work properly if dirty, and you don't want to be depositing bacteria on to the skin.

MAC brushes are expensive but a worthwhile investment if you take the time to properly maintain them. I try to clean mine about once a week, or after a particular makeup application has totally coated the brush. IE: Blushcreme on my MAC 187.

It's important to clean your brushes both immediately before and after doing a makeup application on another person.

I developed my brush cleaning technique simply because no stores where I lived sold brush cleaner. That's probably changed now, but my way works and will cost you virtually nothing- since you should already have everything required.

A clean sink area and counters pace is easiest, but if I'm watching TV sometimes I'll use cups of water (about 3), paper towels, baby wipes and improvise.


Assuming you are washing at the sink, you will need:
  • Dish soap (removes the grease/oil), or a gentle baby shampoo (the perks of being a mom!)
  • a hair conditioner, within reason. I wouldn't use one tinted for, say, red hair. Can't go wrong with a basic moisturizing one. It has to rinse clean! You don't want a greasy brush.Today I used Aveeno Nourish Plus Moisture. 
  • A towel to lay the brushes on
  • Some paper towel if you like (I don't use it for a sink wash)
I've got a double sink so this couldn't be more simple. You might want to designate a bowl or something to toss your soapy brushes into. I throw mine on the dish rack.

First I run warm water. I wet my brushes under the stream of water and work them gently to make sure they're saturated. Then I put them down someplace (dish rack, bowl, clean side of sink, etc) and squirt a glob of dish soap or baby shampoo into my hand. I then take a brush and swirl it through the soap almost like buffing a foundation onto the skin. I put the soapy brush back on the dish rack and grab another. Repeat the swirling. Sometimes you'll need to add a little more shampoo as it'll get used up or turn a gross black colour. With smaller brushes you can swirl two or three of them at a time.

So you're done lathering up your brushes. Now rinse the soap off of your hands and work the brush in your hands, under flowing water to remove the soap. Again, be reasonably gentle with the brushes. You'll want to be thorough in rinsing them, but you're going to condition next so if you miss a bit of soap you'll have another chance. Once rinsed, back on the dish rack they go.

Now you'll squirt a bit of conditioner into your palm and work the brushes through it in the same way. Once you've applied conditioner to all of your brushes, switch the water from warm to cool. Rinse your brushes completely in the cool water. When finished, simply "re-shape" them if needed, and lay them flat to dry.

I usually clean my brushes at night because certain brushes can take about 12 hours to dry. I was sick last night and didn't have to chance to do them until this morning, so I won't be able to wear makeup today. So much for my planned FOTD!


-H. Cat