Showing posts with label Stila. Show all posts

Thursday, April 5, 2012

EOTD: Spring Fresh (+Easter Nails, Kid Pictures!)

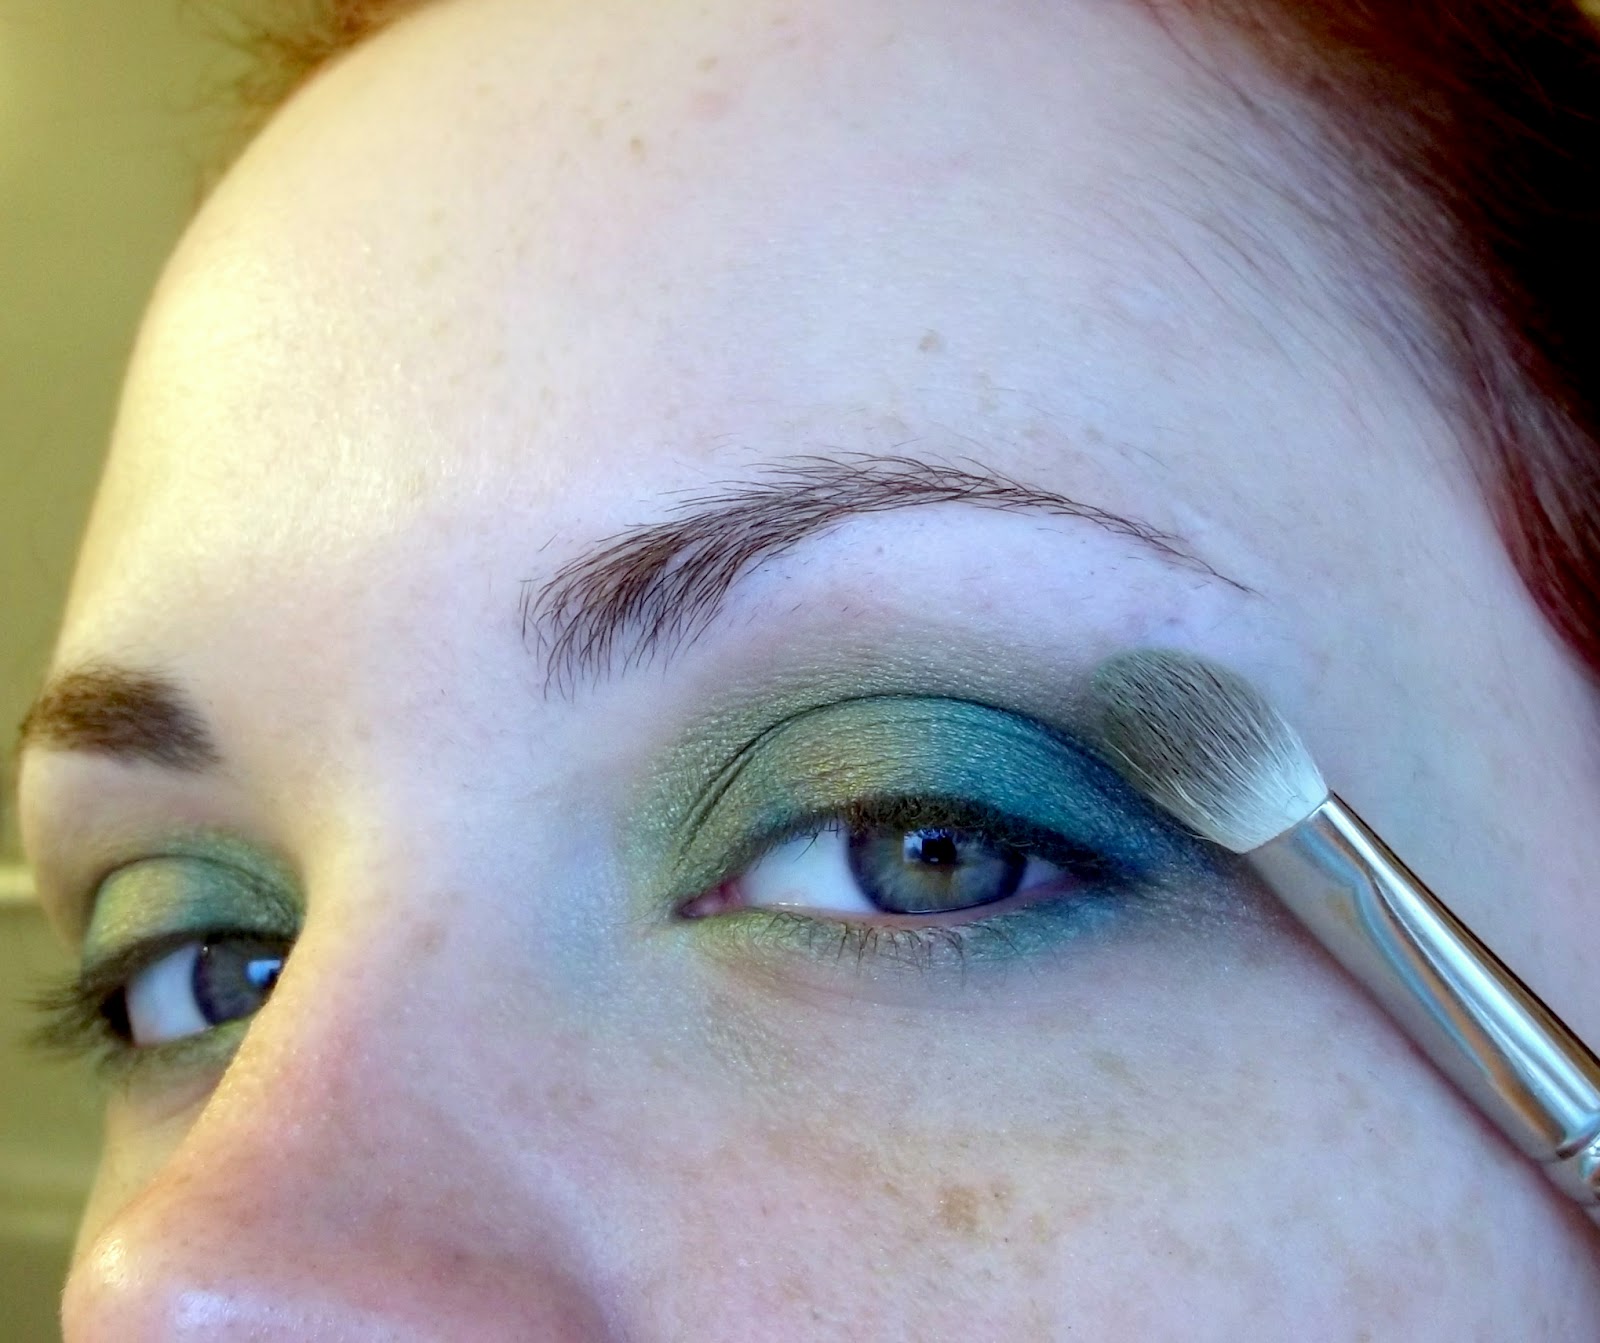
It's unexpected... fresh... and just in time for spring! It's simple, yet interesting and I quite enjoy it. I'm pretty tired after a big hunt for inspiring nailpolish, so I'll give you the short version. :D I prepped my face and eye area in my usual way (see my other FOTD, EOTD's and you'll know how I roll.) The other thing to know is that if I just name a shade and no brand, I can almost guarantee that I am talking about MAC. So if I don't specify, assume MAC!

 I used:
  • Urban Decay Primer Potion
  • Blanc Type
  • Lucky Green
  • Chartreuse pigment
  • Amber Lights
  • Stila Stay All Day Liquid Liner
  • MAC False Lashes Extreme Black
  • MAC Nylon
  • MAC Stubborn Brown pencil
And this was the technique, if you could call it that:
  • Apply your primer and a base
  • Take a short, stiff shading brush and pick up your Lucky Green. Tap the excess off and pack the colour all over your eyelid with a patting motion. I start from the inner corner and work outwards
  • Dampen your brush slightly (Fix+ works great for this, or any water in a squirt or aerosol can even) and dip it into your Chartreuse pigment. Be especially sure to tap the excess because you can get a lot of fallout from pigments. (I recently learned that a little moisturizer on a sponge or Q-Tip does an awesome job wiping away fallout!) Pat the Chartreuse down over the Lucky Green and watch the magic happen! Haha.The colour is gorgeous
  • Now you'll need your pencil brush or whatever you find works best for creasework (I use my MAC 219 religiously for this.) Pick up Amber Lights on your brush and apply to the outter half of your crease with a feathering motion, then a windshield wiping motion
  • Using a fluffy angled brush, sweet Nylon from the outer corner of your eye up and across your brow bone. I also highlighter the inner corner above my tear duct (but not on my eyelid)
  • Now using a blending brush, you'll want to blend the edges of your Amber Lights up into the Nylon. 
  • Pick up a little bit of Amber Lights on your pencil brush and apply it to the outer 3rd or half of your lower lash line, just below the water line
  • Line your waterline with MAC Stubborn Brown pencil 
  • Tightline your lashes with Stila liquid liner
  • Slick on a coat or two of MAC False Lashes Extreme Black
It's a really easy look to create and doesn't take much time at all. I paired it with MAC Style on my cheeks, which is somewhat of a peachy/orange/golden blush, and a coral lipgloss (which you'll see below in the picture of Chloe and I!)


I also made some purchases I'll be reviewing with you shortly.
  • Seche Base
  • Magnetic Force by Color Club in "Electro-Midnight"
  • Nicole by O.P.I Drying Drops
  • ORLY "Won't Chip" Top Coat
I tried out a quick Easter nail...


And snapped a couple pictures of pure sunshine for you!


 <3<3<3
-H.Cat

Wednesday, April 4, 2012

EOTD: Shirley Temple

I named this Eye of the Day after the virgin drink (depending on whose making it, I guess!) not the cute-as-a-button child star.This was a throw together as I waited 15 minutes for the bus. For this look, I made use of:

  • Urban Decay Primer Potion
  • MAC Blanc Type
  • MAC Paradisco
  • MAC Golden Lemon pigment (Goldmine could have replaced this and the Paradisco)
  • MAC Orange
  • MAC Romping (LE) (You could use Free to Be or Passionate)
  • MAC Dazzlelight
  • MAC Feline
  • Stila Stay All Day Liquid Liner
  • MAC False Lashes Extreme Black
  • MAC brow pencil in "Stud"
And this is how you can recreate it:

  • Apply your UDPP
  • Using a big fluffy brush, dust Blanc Type all over. From your eyelid up to your brows
  • Using a shorter stiffer brush, pack Paradisco (or your gold colour) on the innermost half of the eyelid
  • Dampen the same brush slightly and pick up some Golden Lemon pigment. Tap off the excess. Pat this on over top of the Paradisco (You can skip this step if you used a gold instead of Paradisco)
  • You can use the same brush or another short stiff brush to apply Orange to the outer half of the eyelid. Again, really pack it on there
  • After that, you'll want a smaller crease brush, like the MAC 219 pencil brush, and you'll use this to apply your Romping (LE, or dupe) to your crease
  • I used an angled shadow brush to pick up Dazzlelight with a light hand and used it to blend out Romping and highlight my brow bone and brighten the area above my tear ducts
  • Take a small angled brush or a shadow brush and line the inner corner of your waterline with Nylon
  • Pick up some Romping with the same brush, and work from the edge of the Nylon across the middle of your waterline
  • Using the same brush, pick up Orange and work from the outer corner of your waterline inward to meet the Romping
  • Tightline your lash line with Stila liquid liner
  • Tightline your waterline with MAC eyeliner in "Feline"
  • Slick on a coat of False Lashes Extreme Black
And check back later. I'm going to attempt a flame manicure and, if all goes well, an accompanying tutorial!


Tuesday, April 3, 2012

FOTD

This was my Face of the Day. It's more of an Eye of the Day. The colours, particularly the green, absolutely refused to photograph properly! It was MAC's Bitter, so a really intense bright limey almost yellow green. I have every intention of editing this later, as it's rushed and poorly written.
I used:
  • Tarte ReCreate primer
  • Benefit Lemon Aid
  • Urban Decay Primer Potion
  • MAC Blanc Type
  • MAC Too Dolly (LE) (*or MAC Aquadisiac)
  • MAC Bitter
  • MAC Deep Truth
  • Urban Decay Dashiki (*MAC Freshwater works well, too)
  • MAC Nylon
  • Gosh eyeliner
  • Urban Decay 24/7 pencil in Electric
  • MAC Feline eyeliner
  • Stila Stay All Day Waterproof Liquid Liner
  • MAC False Lashes Extreme Black
  • MAC Embark
  • Revlon PhotoReady Airbrush in "Vanilla"
  •  Physician's Formula Peach-to-Glow
  • L'Oreal HIP gloss in "480 - Snazzy"
  • Tarte Smooth Operator powder
Annnd this is how you can create it for yourself. You can use dupes of any of these products. For simplicity's sake, I'll just state what I used:
  • After moisturizing, apply Tarte ReCreate primer to your face
  • Apply UDPP to your eyelids and lower lash line
  • Apply concealer if needed (I applied Benefits Lemon Aid to my under eye, and red areas)
  • Use a big fluffy brush to apply MAC Blanc Type from your lash line up to your brows
  • With a short, stiff shading brush pack on MAC Too Dolly (L.E. from the Hello Kitty, Winter '08/'09, Too Dolly quad) onto your eyelids. You could use MAC Aquadisiac (teal blue)- I don't have it but I would have preferred it for this look.
  • Load Bitter (a super bright snotty green) onto your pencil brush (MAC 219) and tap off the excess. Apply this to your crease. First with a stippling motion, then work in with a windshield wiper motion. You want this to peak just above the crease. 
  • Next, you'll apply Nylon (a frosted pale gold) to the brow bone area with a big fluffy brush, using it to blend the Bitter up, and blend the edges away. You won't so much be blending the Too Dolly and Bitter together. You want those colours to be defined. 
  • Use an angle brush (my MAC 266) or an eyeliner brush to apply Dashiki (a medium sky blue with a hint of teal) from the inside corner of the upper lashline out. You want to keep this close to the lashes, but not so tight that the black liner will cover it
  • Then you'll pick up Deep Truth with the same brush and apply it from the outer corner of the upper lash line, about half way in, blending it into Dashiki in the middle
  • Tightline with your liquid liner (I used Stila Stay All Day)
  • Take Gosh Let's Twist eyeliner (a bright snotty green, equivalent to Bitter) and apply it it generously (so that when you apply your black it will peek through,) from the inside corner of your waterline, half way across
  • and Urban Decay in Electric on the outside, slightly blending them in the middle with an angle or liner brush, exactly as we did with Dashiki and Deep Truth 
  • Apply MAC Feline (a creamy super black eyeliner) working from the outer corner, tapering half way in
  • Slick on a coat or two of  mascara (MAC False Lashes Extreme Black)
  • Using a big fluffy brush (MAC 187), apply Peach-to-Glow to the apples of your cheeks
  • I swept on some L'Oreal HIP in "Snazzy", using the peach side(it's a duo, and they're really pigmented and have a great sheen. These are actually really good!)
  • Set it with powder and a powder brush (I used Tarte Smooth Operator and MAC 187)
  • Fill in brows with an angle brush and MAC Embark, or whatever colour suits your brows (which I did way earlier and forgot to mention. I do brows first. It makes an excellent frame for the rest of your makeup) 


Andddd this link is to the portrait photography page of an amazing local photographer, Dana Brushette. Click "like" on her page to keep up to date on what she's up to. She's always doing cool contests. I entered my son Cailum in her Children's Contest (the Untitled Album) and voting is open until April 21st. We'd love if you would shoot him a vote and help him place somewhere. Dana actually does a lot of cool pinup work that I think you, dear readers, would appreciate. So check it out! Thanks! <3

-H. Cat

Sunday, April 1, 2012

Eye: Peacock

I thought I would do a peacock inspired eye to go with my recent Peacock Nail Tutorial. I haven't done a peacock eye since MAC came out with Peacocky in Winter 2010. The one I did back then was a green and purple, so I thought I'd change it up. This look was a half success. The problem was a combination of things. That I'm feeling lazy, that my brushes were dirty so I couldn't get good colour definition, that I started without a clear idea of what I wanted to do (and overworked my poor sore eye), and also that there were waaay too many colours I wanted to cram in here. I have so many perfect colours!
Anyway, enough buildup! The bottom line is that this is what I did, the colours and brushes I used, and hopefully I inspire someone to try their own.
(Also note my skin in these pictures, in the finished shots. This is the Revlon Photoready Airbrush stuff... Wow! I will review this soon. And finally, excuse my budding unibrow :D)

What I used:

Note that the number has nothing to do with application order... or anything other than to indicate which colour I used)
These are all MAC shadows.
1. Amber Lights
2. Humid
3. Blue Candy (LE)
4. Juxt
5. Freshwater
6. Deep Truth

I have a Lise Watier glitter in the photo that I did not end up using. There is my HG Urban Decay Primer Potion up in the right corner, and from left to right we have MAC False Lashes Extreme Black, Urban Decay 24/7 Pencils in Electric & Baked, MAC pencil in Undercurrent, and Stila Stay All Day Waterproof Liquid Liner.
The 219 that is hiding is a pencil brush. From top to bottom, you'll see me refer to these as  my flat brush, shading brush, blending brush, angled brush, pencil brush, and fluffy brush. 


 I applied Juxt lightly all over my eyelid up to my brow with my big fluffy brush, then I patted it on my lid with my shading brush.


I always wiped my brushes after switching colours, but you should probably use different brushes if possible. I was just being lazy. Here I'm applying Amber Lights to the center of my eyelid in a patting motion using my shading brush.


I used my shading brush and Blue Candy (LE) to apply slightly rounded line of colour. You want this colour to "hug" your eyeball. (sounds gross, right?) 


Then you're going to do the same to the other side of your eyeball, curving outward. Like so... 
After that, you'll be building your colour towards the outer corner of your eye. I applied some Lucky green right beside the Blue Candy, and then some Freshwater. It started to look a bit muddy... too many colours on one dirty brush, but I go back in to define the colours in a minute.

I dipped my pencil brush into Amber Lights and patted over the original section. Then I did the same with Lucky Green, Blue Candy, Freshwater... I went from lightest to darkest just so I wasn't buggering up the brush. I could have avoided this all with better planning, but this is how it all went down! Haha. 


I grabbed my blending brush and very lightly worked from the inside corner to the outside with little outward sweeps. You want to blend it, but not too much. The colour individual should definitely stand out. 

From here I cleaned up the fallout with a Q-Tip and some moisturizer. I took my pencil Brush and applied Deep Truth to the outer 1/3rd of my crease and blended it in a windshield wiper motion with my blending brush, then took my fluffy brush and lightly swept some Juxt overlapping my crease colour and a bit up towards the brow. I blended that very well with little circular motions. I applied my eyeliner, and I used Humid to blend outer corners of my eyeliner up into the Deep Truth applied to my crease. 

A few of my pictures didn't turn out, which is why I don't have pictures of the final few steps, but I used the 3 liners along my lower lash line, just slightly below the waterline (that way when I applied my black liner it wouldn't completely cover them.) I used Baked (the golden colour) in the inner corner, Electric (the bright blue) in the middle, and Undercurrent in the outer corner.I used an angled brush blend the end of one into the start of the next, and flicked the end of Undercurrent up into the winged eyeliner. By now my eyes were so sore from being overworked (it was a trial and error thing) that my eyeliner did not want to stay in place. 

I applied Feline to my waterline, which is a dark black MAC liner. I set it with a fluffy duo fiber brush (MAC 187) and Tarte setting powder. I applied one coat of MAC False Lashes Extreme Black mascara. Somewhere in between I penciled on my brows and applied Revlon Photoready Airbrush makeup with a 187 and a cosmetic sponge. Here is the finished product:


 It's kind of a mess of a tutorial, but it's been a mess of a process! <3
-H. Cat